Your blender works hard to make your favorite smoothies, soups, and sauces. But over time, stubborn stains, lingering odors, and hidden food particles can build up, affecting taste and performance.
If you want your blender to stay fresh, clean, and ready for every use, learning how to deep clean it properly is key. Keep reading, and you’ll discover simple, effective steps to restore your blender’s sparkle—making your kitchen routine easier and your drinks tastier.
Preparing The Blender For Cleaning
Preparing your blender for deep cleaning is the first step to get it spotless. Proper preparation makes cleaning easier and safer. It helps remove stuck food and prevents damage to parts.
Start by taking the blender apart carefully. This allows you to clean each piece well. Also, follow safety rules to avoid accidents or injuries during cleaning.
Disassembling Blender Parts
Remove the blender jar from the base. Take off the lid and any removable rings. Unscrew the blade assembly from the bottom of the jar. Keep all small parts in a safe place. Check the user manual for specific disassembly steps.
Separate each part gently to avoid breaking. This helps clean every corner thoroughly. Cleaning parts separately prevents food buildup and bad smells.
Safety Precautions
Unplug the blender before starting any cleaning. Avoid touching the blades directly; they are very sharp. Use a brush or cloth to clean around blades. Handle glass jars carefully to prevent cracks or breaks.
Keep children away during cleaning to avoid accidents. Dry all parts completely before reassembling. This prevents mold and keeps the blender working well.
Quick Cleaning Techniques
Quick cleaning techniques save time and keep your blender fresh. These methods help remove leftover food and odors fast. Use simple ingredients found in most kitchens. Clean your blender right after use for best results.
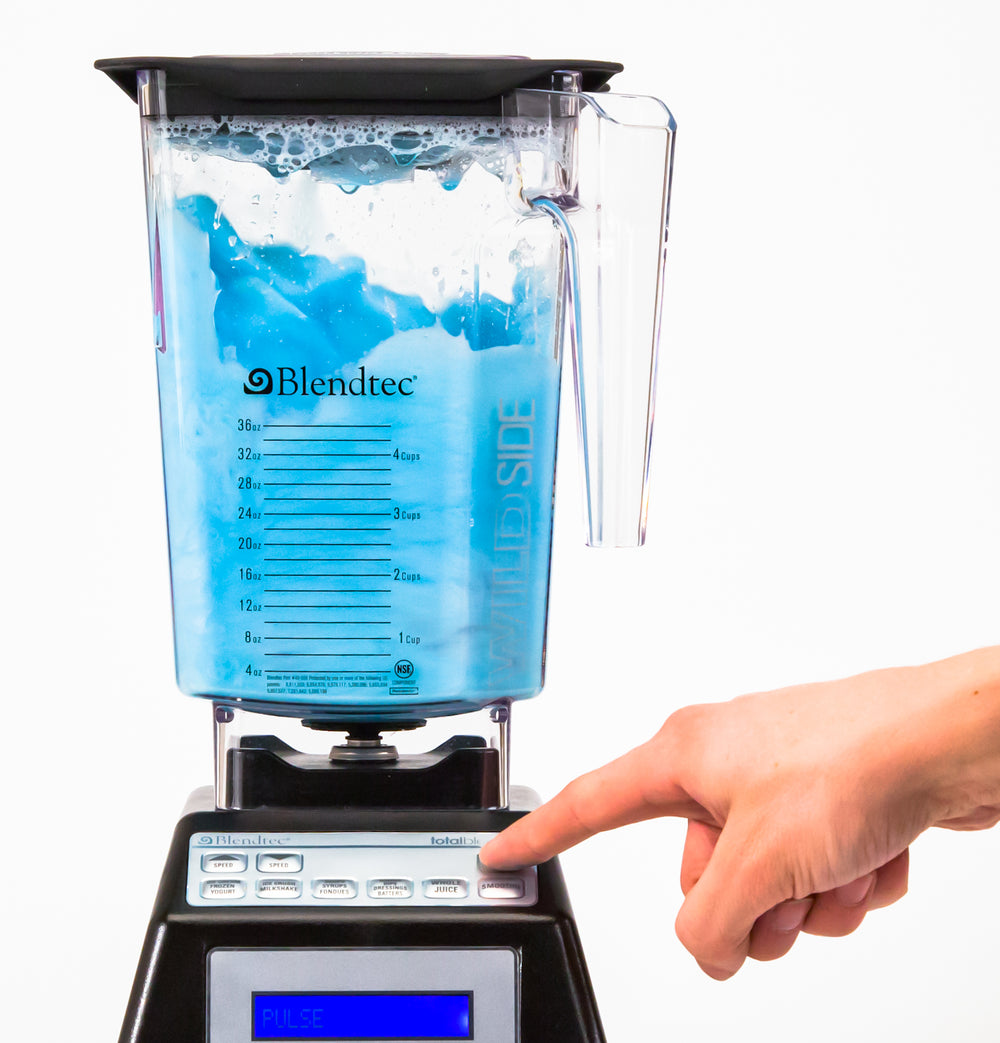
Using Soap And Warm Water
Start by rinsing your blender with warm water. Add a few drops of dish soap inside. Fill halfway with warm water and secure the lid. Blend on low speed for 30 seconds. Rinse thoroughly with clean water. Dry with a soft cloth or let air dry.
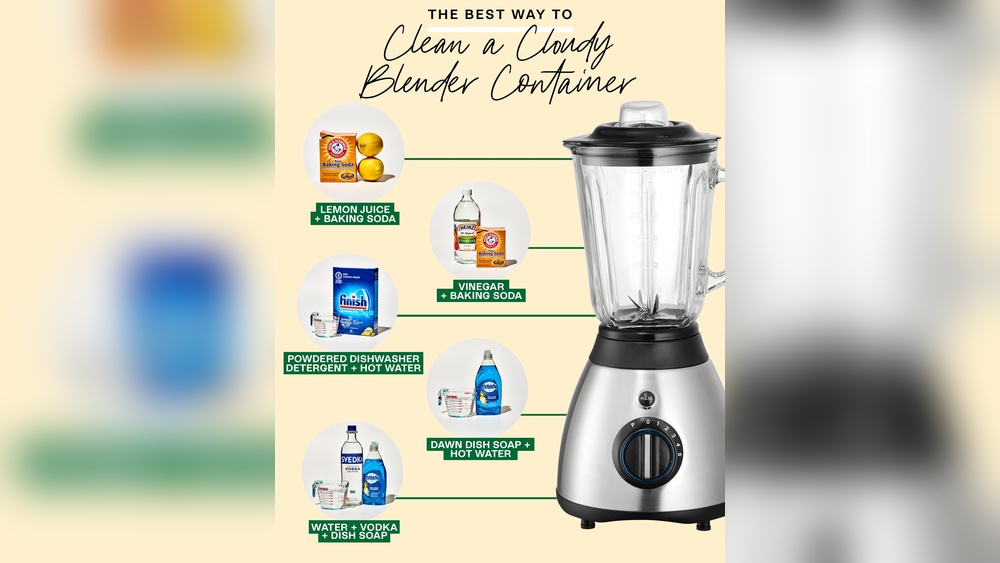
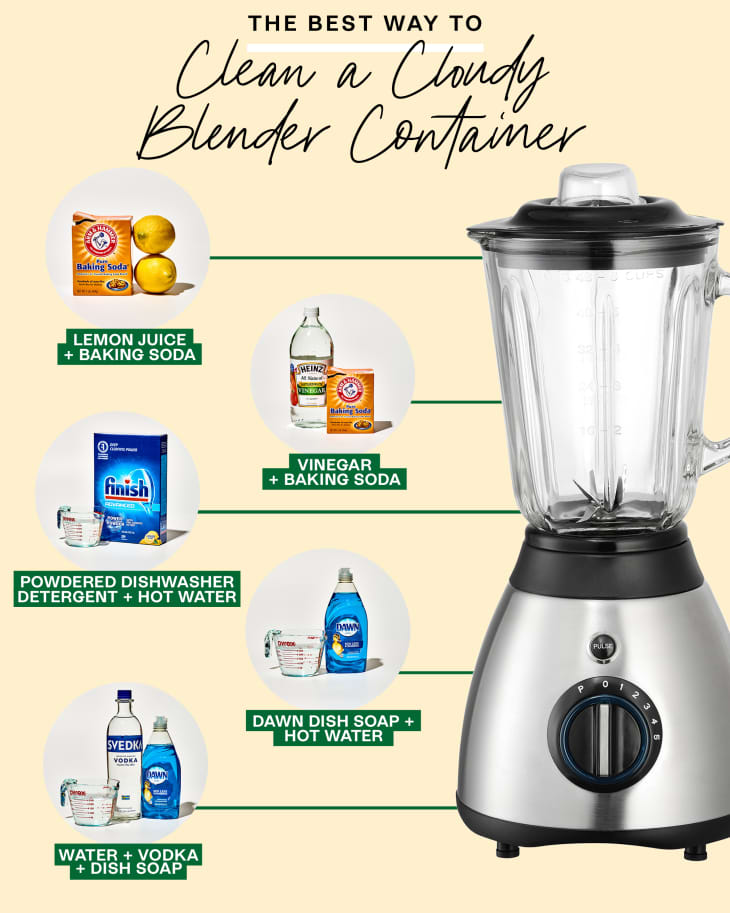
Cleaning With Baking Soda
Sprinkle baking soda inside the blender jar. Add a small amount of warm water. Use a soft sponge or cloth to scrub gently. Baking soda removes stains and neutralizes odors. Rinse well with water afterward. Repeat if any residue remains.
Deep Cleaning Methods
Deep cleaning a blender removes hidden dirt and keeps it safe to use. Regular cleaning stops smells and food build-up. It also helps your blender work better and last longer. Use these simple methods for a thorough clean.
Removing Stubborn Stains
Fill the blender jar halfway with warm water. Add a few drops of dish soap and a tablespoon of baking soda. Blend on high for 30 seconds. The mixture loosens tough stains and food bits. Rinse the jar well with clean water. For very stubborn stains, soak the jar in vinegar for 15 minutes. Scrub gently with a soft sponge. Avoid harsh scrubbers to protect the jar’s surface.
Cleaning The Blender Base And Blade
Unplug the blender before cleaning the base. Wipe the outside with a damp cloth and mild soap. Use a toothbrush to clean tight spots and around buttons. Remove the blade assembly from the jar carefully. Wash blades in warm soapy water. Use a brush to clean hard-to-reach areas. Dry all parts fully before reassembling. Never submerge the base in water. This protects the motor and electrical parts.
:max_bytes(150000):strip_icc()/GettyImages-1322052001-dd45ef51e4c646f09286b7bd52e81953.jpg)
Credit: www.southernliving.com
Drying And Reassembling
Drying and reassembling your blender is a crucial step after cleaning. Proper drying stops water from causing damage or mold. Putting the blender back together correctly ensures it works well next time.
Take your time with both steps. They keep your blender safe and ready for use.
Proper Drying Tips
After washing, dry all parts with a clean towel. Use a soft cloth to avoid scratches. Let small parts air dry on a clean rack. Avoid putting wet parts directly in storage. Water trapped inside can cause bad smells and rust. Make sure the blade area is completely dry. Leave the lid open for a while to dry inside. Drying well prevents mold growth and keeps the blender fresh.
Reassembling The Blender
Start by placing the blade assembly back into the jar. Check that it fits tightly and locks in place. Next, attach the jar to the blender base. Make sure it sits firmly and does not wobble. Put the lid securely on top. Some lids have a seal; check it is clean and dry. Press the lid down firmly to avoid spills. Test the blender by turning it on briefly. This confirms everything is working correctly. Proper reassembly keeps your blender safe and lasts longer.
Maintaining Blender Cleanliness
Keeping your blender clean is key for healthy drinks and long appliance life. Dirt and food bits can build up fast. This causes bad smells and poor blending. A clean blender works better and lasts longer.
Regular care prevents tough stains and clogged parts. It also stops bacteria from growing. Simple habits make cleaning easy and quick. You save time and enjoy fresh, tasty smoothies every time.
Regular Cleaning Schedule
Clean your blender right after each use. Rinse the jar and lid with warm water. Use a soft sponge and mild soap to scrub. Avoid harsh scrubbing that can damage parts.
Once a week, do a deeper clean. Take apart the blades and seals carefully. Wash all pieces with warm soapy water. Dry them fully before putting back together.
Check your blender’s manual for specific cleaning advice. Follow these steps often to keep your blender spotless.
Preventing Odors And Residue
Bad smells come from leftover food stuck in hard-to-reach spots. To stop this, blend warm water with a drop of dish soap. Run the blender for 30 seconds. Rinse well to remove soap and grime.
Use white vinegar or lemon juice to freshen the jar. Let it sit for a few minutes, then rinse. This removes strong odors and stains.
Dry all parts completely before storing your blender. Moisture can cause mold and bacteria. Keep your blender clean and smelling fresh.
Credit: www.blendtec.com
Credit: www.thekitchn.com
Frequently Asked Questions
How Often Should I Deep Clean My Blender?
Deep clean your blender once a week to remove stubborn stains and smells. Regular cleaning keeps it fresh and safe for use.
What Household Items Work Best For Deep Cleaning A Blender?
Use warm water, dish soap, and white vinegar for an effective deep clean. Baking soda also helps remove tough stains.
Can I Deep Clean My Blender Without Disassembling It?
Yes, blend warm soapy water inside the blender for a quick clean. For thorough cleaning, disassemble the parts and clean separately.
How Do I Remove Strong Odors From My Blender?
Blend lemon juice or baking soda with water to freshen the blender. Let it sit for 10 minutes before rinsing well.
Is It Safe To Put Blender Parts In The Dishwasher?
Most blender parts are dishwasher safe but check the manual first. Place small parts on the top rack to avoid damage.
Conclusion
Deep cleaning your blender keeps it working well and fresh. Regular cleaning stops old food from building up. Use warm water and soap to wash all parts carefully. Don’t forget to clean the blades and lid. Let your blender dry completely before storing it.
This simple routine saves time and keeps your blender safe. Clean blenders make better smoothies and drinks. Try these easy steps often for the best results. Your blender will thank you with every use.